
It’s been just over a year since HubSpot launched Custom Objects and opened up a whole new world of possibilities when it comes to how your business handles its data. Sam Banks, our Technical Digital Strategist at Fuelius, explains how to create a Custom Object in HubSpot without having to use code, watch his video here or follow the handy guide below...
Hub: Sales
Difficulty: Hard
Tier: Enterprise
- Introduction to Custom Objects
- HubSpot API Documentation
- Creating a Custom Object
- Obtaining your API Key
- Testing your Custom Object
- Reviewing your Custom Object

Introduction to Custom Objects
As you may already be aware, HubSpot is split into 5 main core objects. However, HubSpot understands that sometimes these 5 may not be specific enough for your business. So, whether you're wanting to create an object for conversions, investors, or memberships, you can now do all this and more with HubSpot's Custom Object tool.
HubSpot API Documentation
First, head over to HubSpot's CRM Custom Objects page. Here, you will need to make sure that you meet a few prerequisites, such as having an Enterprise level subscription to HubSpot, and no more than 10 CRM custom objects in a singular portal.
This may be subject to change, however, so make sure you keep up to date with the latest documentation released from HubSpot. There's a lot of helpful information on this page so make sure to give it a read before moving on.
Creating a Custom Object
On HubSpot's CRM Custom Objects page, you'll see a tab that reads 'Object Definition', here is where you will start to define the actual criteria for your new custom object.
When you click this tab, it is going to bring up some input boxes and a sidebar of code. But keep calm and don't panic, you don't need to know any code. From the navigational dropdown under the tabs, select the 'create new schema' section or simply scroll down the page to find it. Once there, move down to where you see the subheading 'Parameters', and then scroll further down again to the 'Labels' section within it.
We now need to name the object by its singular title. So let's say your custom object is about cars 🚗 for example. The singular for cars is 'car', and the plural is 'cars' so go ahead and type in the singular and plural titles of your custom object into the relevant boxes in this section.
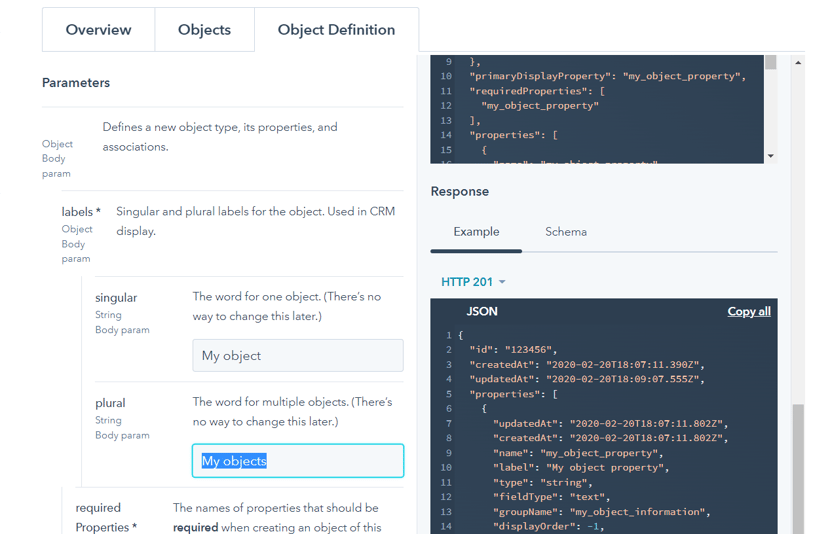
When setting up any new object, it will have to create some form of field, offset by the API, in order to actually store a record. So the next step is to enter the specific properties that appear when you create a new record. The required properties for our cars 🚗 example are going to be the make and the model.
After that section, you have the searchable properties, and in this case, we want to be able to search for the values under the make and model. Meaning all you need to do is just add in again any of the required properties that will have values you wish to be searchable. (For us, this is going to be both make and model again.)
Lastly, properties are where you can start to fill out the finer details of your custom object's values. If we start with make for example, we would type in 'make' or 'car-make' into the name section (you must use underscores for spaces or else your API call will fail) and then do the same for the label (but here we can use spaces and a capital letter, 'Car Make').
Next, scroll down to the type section to enter what data type your custom object will be. In our cars 🚗 example, we will choose enumeration because we specifically want to use a dropdown. And just underneath that, field type is how you control how the property appears in HubSpot and here we will be writing in our option which is select, then repeat this properties process for the model and any other additional values you may have. Now, if you're not sure what your type or field type should be, switch from the Object Definition tab over to the Overview tab at the top. There will be a matrix that describes the differences and gives more information on each option to help you choose.
Those are the sections with asterisks that you must fill in, the other sections such as group name, description etc. can be filled out now if you'd like but they're not necessary in order to successfully create a custom object.
We've now completed the make value for the make property, which leads us to the model. So scroll down to the next section and input the data for the model using the previous steps.
Then, still using our cars example 🚗, we can choose the criteria for the model, e.g. Civic is a model from the Honda range, and the description would be 5 doors, 5 seats, 4 wheel drive etc. If you're using data similar to our example, you may want to leave the display value blank as Honda Civic is not completely unique and there will most likely be more than one person with this car.
Obtaining your API Key
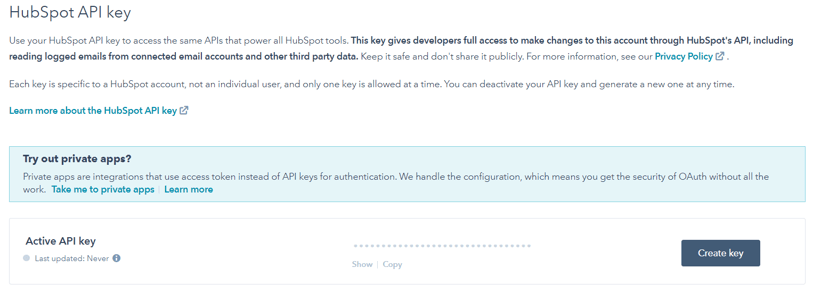
Open a new tab so you don't lose all your work, and then head over to HubSpot. Go to your settings, click on "integrations" and then select API key. By default, this will always be covered up for protection, but you can click show and it will display your key.
Testing your Custom Object
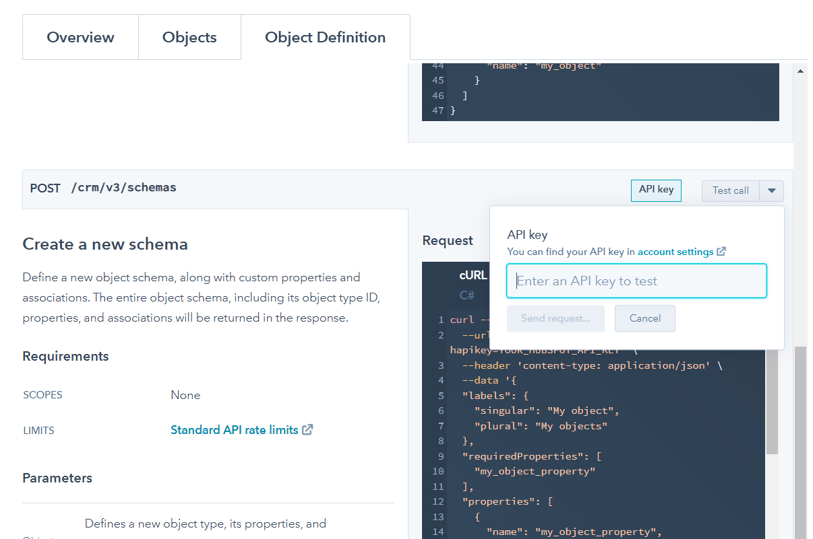
You can now do a test call to your HubSpot portal here. Click the Test call button and enter your API Key and select send request. If you get a 1 or 2 in your response, the test has been successful and added to HubSpot!
If you get a 400 error that means something has gone wrong. A common reason why this happens is that one or some of the values you specified don't match up with the object definition. A way to check this is to scroll down to the bottom of the 'create new schema' section until you find a button where it says ‘see all params’. If this button is visible, there’s a chance you've missed a certain field. Scroll back through your work to check you've completed all the fields with an asterisk and then try again.
Reviewing your Custom Object
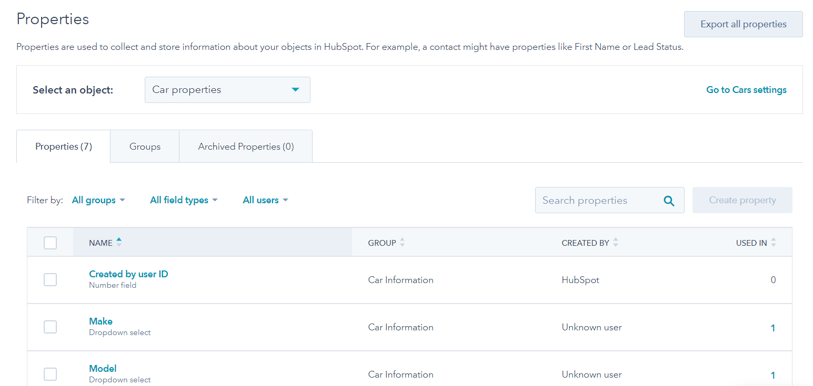
Now that you've created and tested your custom object, it's time to jump over to HubSpot to review it. If you head over to your database and go to contacts, we should now be able to see your new custom object. Here, you can filter, report, create new records, and associate your custom object with deals and tickets.
You've only set up the skeleton of your custom object in HubSpot at the moment, so it's likely that you're next move will be to build this out. To do this, go to Settings in HubSpot, and select properties. From the dropdown in the top middle of the page you, choose your custom object, and here you can see what you previously created but now in HubSpot. Now you can go into each section and add or refine the details and build out your full custom object without the need to go back to the documentation and continually do API calls.
Lastly, you can also import CSV files into your custom object as well. Go back to your database, and clicking on import in the top right-hand corner and follow the upload instructions. And that’s it! That’s how to create a custom object in HubSpot without any code.
If you're looking for further HubSpot support from an elite HubSpot Partner Agency, our team would ❤️ to help you out! Book a call with us today.